Saturday 17 July 2010

Castle Card


This is my first attemped at using digital downloads - so I can't claim ownership of the design. I love how this turned out though.

I printed the castle out on one sheet of A4 card and then printed the dragon and the knight a couple of times. Cutting them out was tricky! I decoupaged the arms, sword and helmet of the knight and the leg, arm, wing and ear of the dragon.

To add some bling to the design I added sliver glitter to the sword, gold glitter to the feather on his helmet and holographic glitter to the dragons tummy.

I have to say though, neither the decoupage or the glitter shows up that well in the photo.

That's it for now
x

Thursday 22 April 2010

Dragonfly Part Two

This is another version of the dragonfly stamped card. I had some of the embossed dragonflies from the other day still left over.

I cut round one completely and the other one I just cut out the wings with the idea of mounting them on top with silicone glue. It certainly is fiddly cutting them out!

I stamped some co-ordinating card with the same dragonfly stamp and silver ink. I joined the stamped card to a lighter shade and covered the join with paterned paper and silver ribbon.

Really all that is left to do is stick the dragonfly on. And that's it really!


Tuesday 20 April 2010

Cat & Dog

This card was made with some bubble stickers I bought from Poundland. It's definitely worth going there for cheap crafting bargins.

When I stuck the sticker on I noticed that the colour on the dog's bow had worn a little. To hide this I covered with glossy accents glue and some fine pink glitter.

I used some sticker sentiments and embellished with some silver stars to match. All in all, really easy!


See you soon,
Sarah
x

Monday 19 April 2010

Baby Girl Card

I made this card for a lady at work whose cousin had just had a little baby girl. I recently bought some baby themed embossing folders, so it was a good excuse to use them again.

Using some nesting square punches I punched three squares in two different pinks, and used the smallest square for the baby feet.

I then used the same pink card with the Xcut heart border punch, ribbon and some pink gingham paper to make the sentiment. I wrote Welcome Baby Tilly in hand and finished with some pink buttons.

The final touch was to use pearl nail gems to embelish the embossed feet.

This was all quite simple and quick.


Sunday 18 April 2010

Dragonfly Card

I have had a busy few days, so I have not been able to make anything or upload anything to the blog.


I wanted to practise using embossing powders as I have not used them much at all. I am quite pleased with the results as in the past I think that I have held the heat gun too close and the paper has gone a bit warped as a result.

I allowed the dragonfly to cool and then cut it out with some very small scissors!

Using some co-ordinating cor'dinations card I puched three squares and gave them a distressed look.

Using the lighter cor'dination colour I punched a border and wrapped with some cream ribbon.

I chose a co-ordinating Do Crafts paper and matted it to the lighter card stock. And then stuck the squares and border to the card.

I was thinking of sticking a sentiment on the card, but thought that it would look too fussy.


This is a closer view of the dragonfly.
See you soon,
Sarah
x

Wednesday 14 April 2010

Happy Birthday Cat


Another really quick card. I've used a free stamp I had from Cardmaking and Papercraft and coloured the image with Papermania's watercolour pens.
I die cut the stamped cat and as I had chosen a green theme I matted it onto pale green card.
I layered green card onto a ready made card blank and topped off with My Mind's Eye green spotty paper.
Really all that was left to do was to stamp a sentiment and embellish with some pale green gems.
I won't be posting anything tomorrow, so see you on Friday!
Sarah
x

Tuesday 13 April 2010

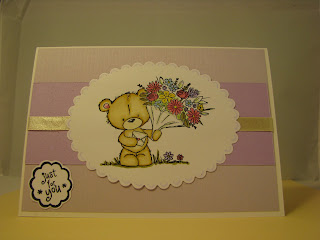
Just For You Bear


This is another easy card! I have used the same stamp that is in the blog from a few days ago and have used Papermania pens to colour.
I have used one of the lilac pens to draw freehand around the diecut shape - although this has not shown up that clearly on the card.
Simply layer two different tones of card on the base and finish with a ribbon.
I have stamped another sentiment from the Hero sentiments set.
That's really all there is to it!
Sarah
x